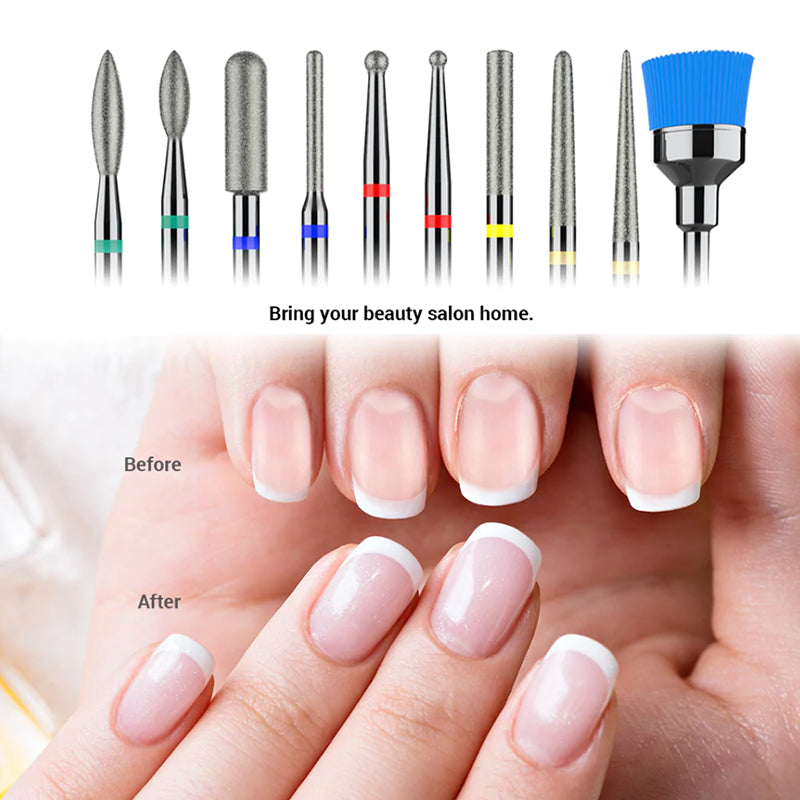
Whether you are planning to remove gel polish, or acrylics, knowing how to choose a suitable nail art drill will help you get started quickly. In the past, you may have always learned that people distinguish nail art drill bits mainly by their shape and material, but the truth is that there are many more aspects to consider when choosing one. You will be surprised how easy it is to create a perfect nail art once you have chosen the right nail art tools. Let’s dive right in now!
What is a nail art drill?
A nail art drill has two main parts adjacent to each other, a handle and its head. The shank is inserted into the handle and the head works on the nail. Most nail art drill heads are compatible with the standard handle size of 3/32 inch in diameter and when choosing a nail art drill tool, it is important to make sure it is compatible with that size. Attached to electric nail art drills, they can perform different filing tasks such as polishing natural nails, shaping nails, removing cuticles or calluses from the sides of nails, saving the nail technician’s time and effort.
What do you need to consider before getting a manicure?
1. Function
Prepare the cuticle
Whenever you want to start doing a manicure, you will find that the first step is always to prepare your cuticle, this is because it allows your nail bed to look clean and flat to avoid sticking to your nails later.
The Diamond Cuticle Manicure Drill Set, made from high quality, hard wearing carbide, is perfect for removing, cleaning and smoothing out cuticle areas. Provides an easy, quick and safe way to prepare your cuticles, ensuring a perfect start for the following manicure.
The next step is the main application of the nail art drill, i.e. removal, shaping, polishing, etc. Therefore, it can be confusing to choose which nail art drill to use for a satisfying manicure.
The large barrel-style smooth top nail head features a cross-cut design for safe, fast smoothing of contoured gel nail surfaces or nails. The smoother, rounded top protects cuticles and sidewalls from scratches and cuts on contact and is novice friendly.
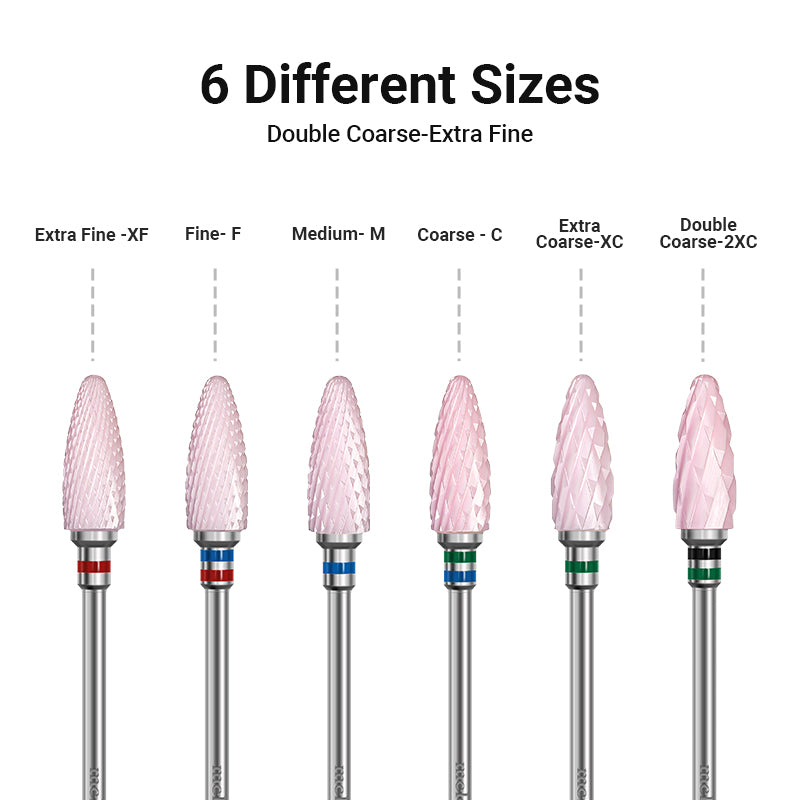
The ceramic flame tip has good heat dissipation and its top is designed with an oval shape for a more open view and softer gel removal. And they are suitable for people who are allergic to metal.
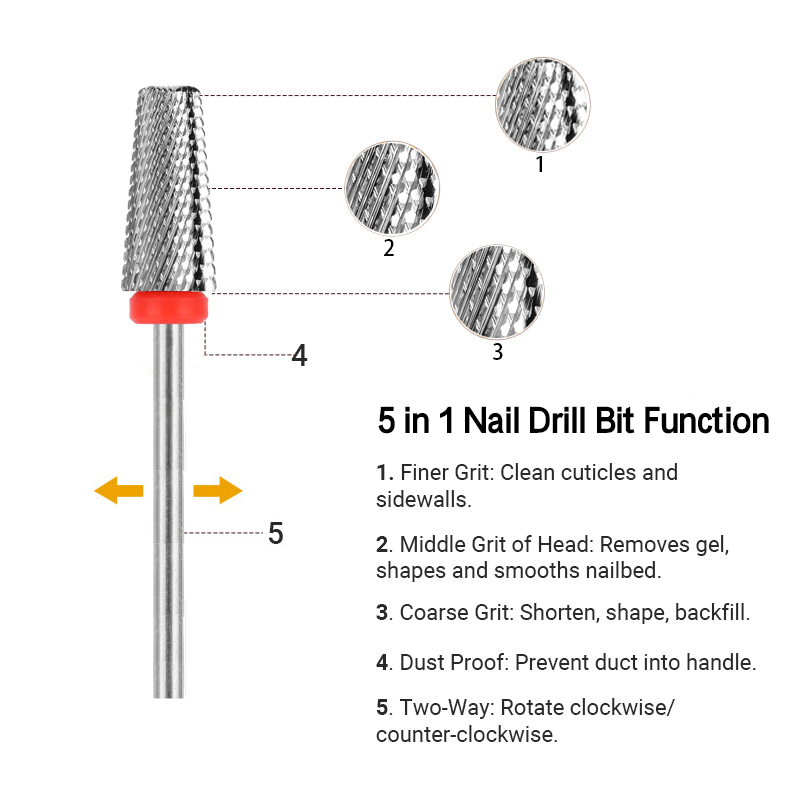
And of course there is the versatile 5-in-1 professional tungsten carbide nail bit for everyone, designed with a mix of 3 different tooth shapes, you don’t even need to change the bit when cleaning your nail, it removes hard gel, base gel and soft gel separately in one go.
2. Grit
When using an electric nail drill for your manicure, the last thing you want to happen is to find out you’ve damaged your nail bed! Therefore, the sharpening of the nail art drill bit will be a key factor that you must consider.
Generally, each nail art drill bit comes with a colored coil, and the grade represented by the coil can be identified by different colors. And it can be divided into three basic levels. Fine, Medium, and Coarse. The coarser the grit, the sharper the nail head. For more experienced users, coarse is the superior choice for speed. However, to be on the safe side, beginners are advised to start with the finest and gradually increase as they become more proficient.
3. Cutting Design
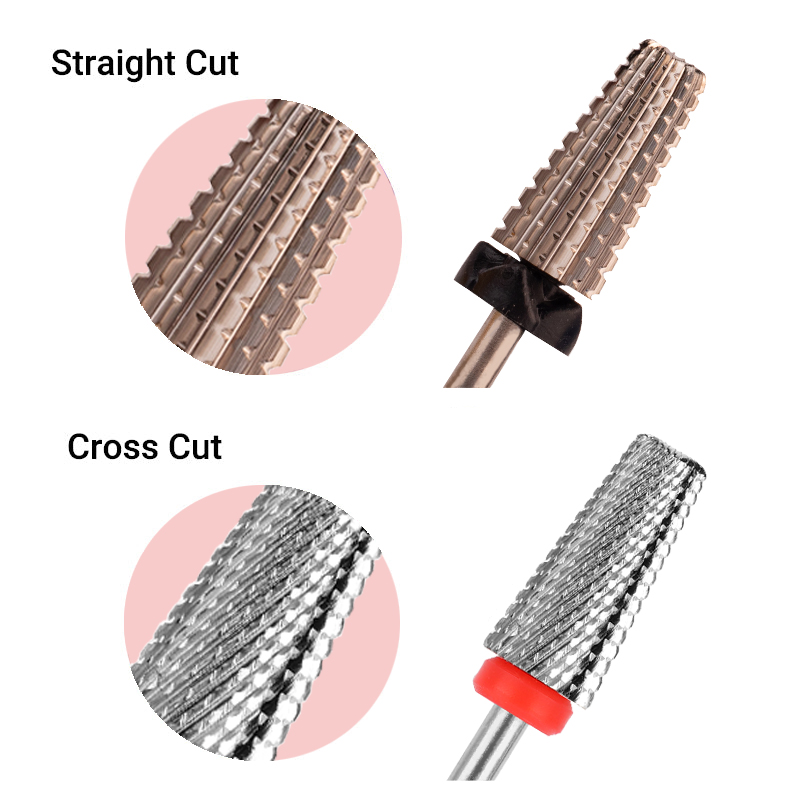
The 5-in-1 straight cut nail bit exhibits a sharp, straight tooth line design for quick nail removal and is suitable for hard gel polish, and experienced nail technicians.
The 5 in 1 cross cut nail bit exhibits a pronounced cross cut tooth line design that allows it to provide more support points to disperse the filing force while working, making it softer than a straight cut, while being slower and more stable in the process. It is recommended that beginners start with the thinnest of these.
4. Direction of rotation
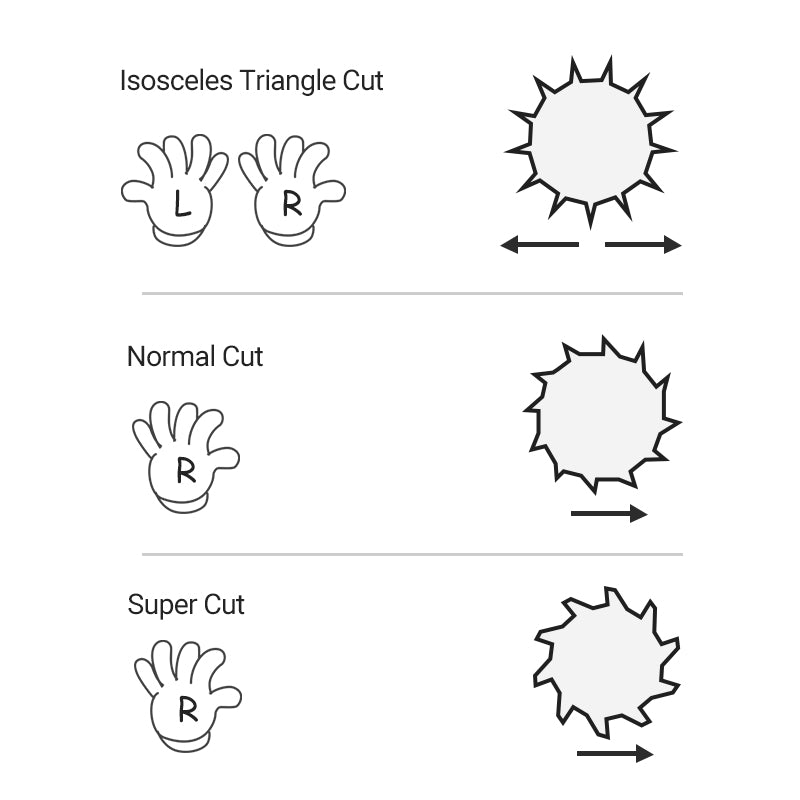
When actually working with nail drills, you may notice that not all nail drill bits support forward and reverse rotation. This is determined by the shape of the cut of the nail bit.
If it is an isosceles triangle, then obviously the direction of rotation will not affect how well it works, which is why it works for both left-handed and right-handed people. If it is a normal cut nail bit, it will be a triangle that is slightly tilted to one side, so you will get a better polish when it is rotated to the side it is tilted to. There is also a super cutting nail bit that is right-angled trapezoidal and only supports a single direction of rotation, but is more durable, powerful and quite suitable for some hard gel removal.
Some maintenance tips worth knowing
1. Clean them regularly
Regular and proper cleaning of your nail drills is essential to prevent the infection and spread of diseases and bacteria, especially when you use them on your clients’ nails. In addition, it keeps your nail heads sharp and in good condition. Ideally, you should clean your nails after each use.
First, brush off any remaining dirt or grime with a brush, soap and water. Next is the disinfection step. Soak them in 75% alcohol or other disinfectant for a few minutes. Finally, take them out to dry and then ideally put them in a special nail drill organizer storage bag to ensure they are not attacked by other chemicals.
Note: Ceramic tips are not suitable for exposure to UV light as it may discolor the ceramic.
2. Keep it dynamic
Natural nails are most susceptible to damage from heat build-up, so remember to always keep your nail drill dynamic rather than applying it repeatedly in one place, otherwise your nails can easily be damaged from over-filing.
3. Replace in time
If you don’t replace your nail bits for a long time, it’s not hard to notice that they will become duller and duller, making you spend more time and effort to complete the nail filing job. This is not only a huge waste of your time, but it can also cause pain in your wrist. Therefore, replacing nail bits in a timely manner is something we always recommend. Generally speaking, tungsten nail bits need to be replaced every 2 or 3 months, while ceramic nail bits need to be replaced in a much shorter period of time, i.e. they need to be replaced in about 1 month. Of course, it also depends on how often you use them and the type of removal. For frequent use and application of some hard work, then shorter replacement intervals should be considered.
After reading this complete explanation, I believe you should have a full understanding of what a nail bit is and how to use it. When you have the right nail drill bits on hand, the easier your manicure will be, resulting in better results.
Welcome to Wuxi Yaqin Trading Co., Ltd. Yaqin has been focusing on the manufacture and export of high-quality abrasive products. One-stop service from production to delivery, and has professional and rich OEM/ODM service experience.
In Yaqin, we will always adhere to the concept of “integrity, rigor, responsibility, mutual benefit”, and keep moving forward, making Yaqin nail drills an ideal choice for your large-scale work.
Post time: Oct-28-2022
